 Save
Save My cousin brought a tray of these to book club last spring, and I watched them disappear faster than the actual discussion. The contrast between that crisp cereal snap and the slow melt of chocolate stuck with me all week. I made my first batch the following Saturday, and by Monday my coworkers were asking if I'd consider a side hustle. There's something irresistible about taking a childhood favorite and dressing it up with a glossy chocolate coat.
I remember packing a dozen of these for my nephew's soccer tournament, tucked between ice packs in a cooler. By halftime, parents I'd never met were asking for the recipe, and one dad offered to trade his famous salsa verde. That day I realized these bars aren't just treats, they're conversation starters. Every time I press that warm, marshmallow-coated cereal into the pan, I think about how something so simple can create those little moments of connection.
Ingredients
- Unsalted butter: Melts the marshmallows into that signature gooey binder, and a little extra greases your pan so nothing sticks when you're ready to slice.
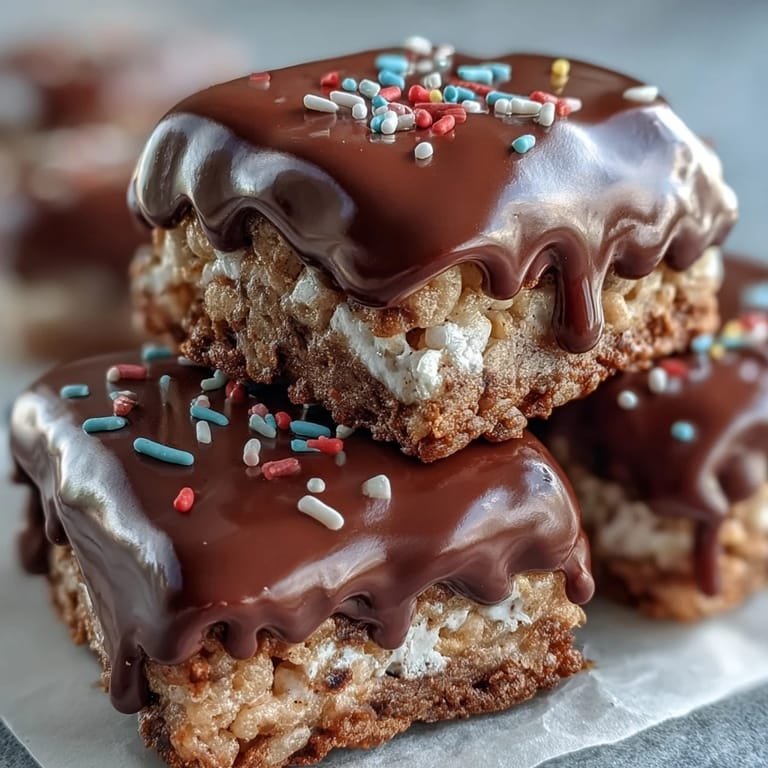
- Mini marshmallows: The glue that holds everything together, melting into a sticky-sweet cloud that coats every puff of cereal.
- Rice Krispies cereal: Provides that iconic snap and crackle, staying light and crispy even under all that marshmallow.
- Fine sea salt: A pinch balances the sweetness and makes the chocolate topping taste even richer.
- Semisweet or dark chocolate chips: Forms a smooth, glossy shell that firms up beautifully and adds deep cocoa notes.
- Vegetable oil or coconut oil: Thins the chocolate just enough to spread evenly without clumping.
- Rainbow sprinkles or chopped nuts: Optional but they add pops of color and extra crunch that make each bar feel festive.
Tired of Takeout? 🥡
Get 10 meals you can make faster than delivery arrives. Seriously.
One email. No spam. Unsubscribe anytime.
Instructions
- Prep your pan:
- Rub a thin layer of butter across the bottom and sides of your 8x8-inch or 9x9-inch pan. If you want easy lift-out later, line it with parchment paper and butter that too.
- Melt the butter:
- Set your saucepan over low heat and add the butter, stirring gently so it melts without browning or sizzling.
- Dissolve the marshmallows:
- Toss in all those mini marshmallows and keep stirring until they collapse into a smooth, glossy pool. Remove the pan from heat as soon as the last lump disappears.
- Season the base:
- Stir in the sea salt if you're using it. That tiny pinch wakes up all the other flavors.
- Fold in the cereal:
- Pour the Rice Krispies into the saucepan and use a spatula to fold gently, making sure every piece gets coated without crushing the puffs.
- Press into the pan:
- Scrape the mixture into your prepared pan and use a buttered spatula or lightly buttered hands to press it down evenly. Firm pressure keeps the bars from crumbling later.
- Let it rest:
- Leave the pan on the counter for about 10 minutes so the base cools and sets just enough to support the chocolate.
- Melt the chocolate:
- Combine chocolate chips and oil in a microwave-safe bowl, then heat on medium power in 30-second bursts, stirring after each until the mixture is smooth and shiny.
- Pour and spread:
- Drizzle the melted chocolate over the cooled cereal layer, then use an offset spatula or the back of a spoon to spread it edge to edge.
- Add the garnish:
- Scatter sprinkles or chopped nuts over the wet chocolate right away so they stick. Work quickly before the chocolate starts to set.
- Set the chocolate:
- Let the whole pan sit at room temperature for at least an hour, or pop it in the fridge for 20 to 30 minutes if you're in a hurry.
- Slice and serve:
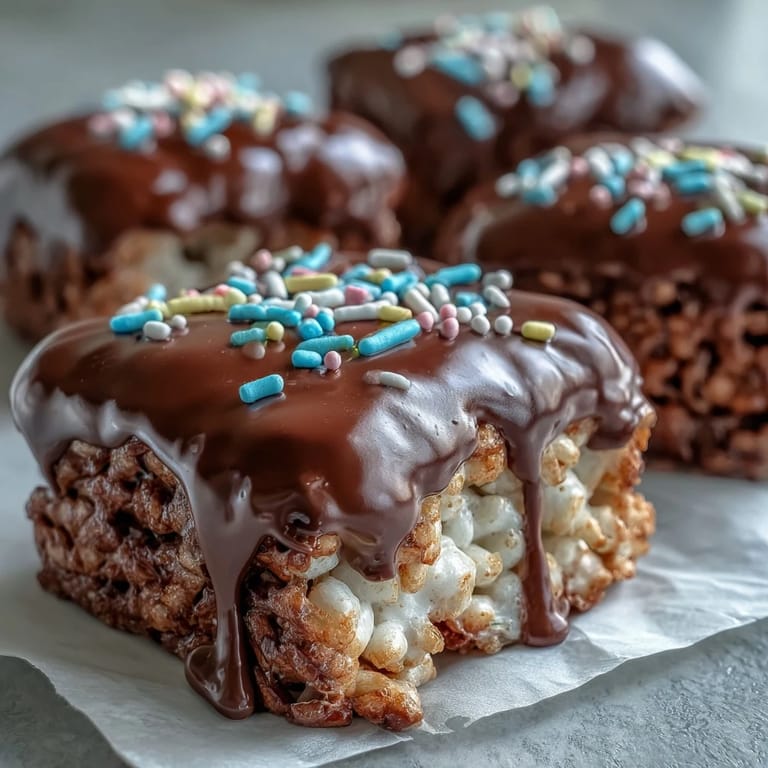
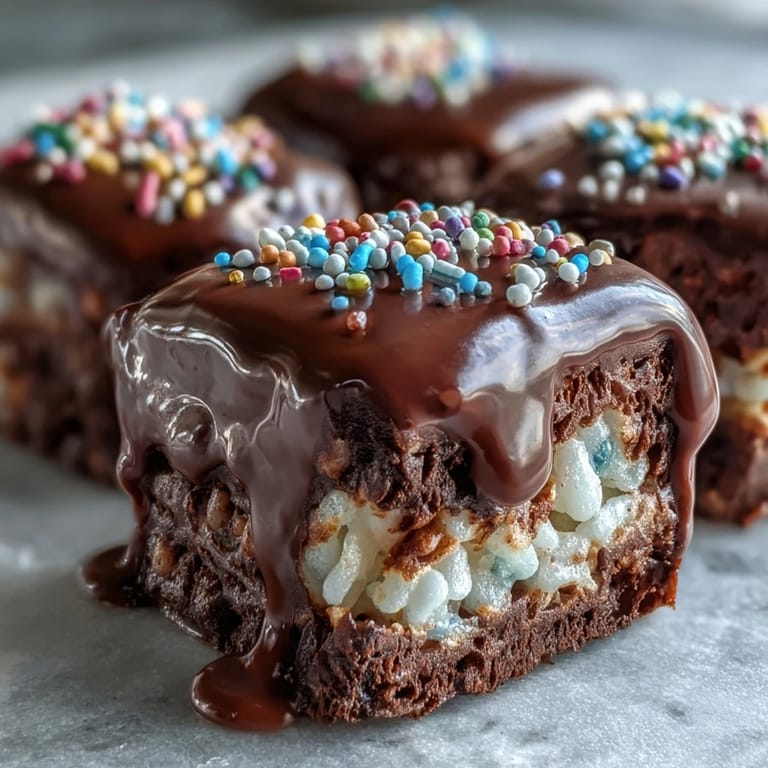
- Once the chocolate is firm, lift the block out using the parchment overhang or flip the pan onto a cutting board. Cut into 12 to 16 bars with a sharp knife, wiping the blade between cuts for clean edges.
 Pin it
 One rainy afternoon, my daughter and I made a double batch and spent an hour decorating each bar with different sprinkle patterns. We ended up with a rainbow of designs spread across the counter, and she insisted on labeling each one with a tiny flag. That batch never made it to the intended bake sale because we kept sneaking pieces, laughing at our own lack of willpower. Now every time I make these, I remember her sticky fingers and the way she giggled when the chocolate dripped off the spatula.
Storing Your Treats
I learned the hard way that leaving these uncovered on the counter invites the cereal to go soft and the chocolate to dull. An airtight container keeps them crisp and glossy for up to three days at room temperature. If you want them to last a week, tuck the container in the fridge, but let the bars sit out for a few minutes before serving so the chocolate isn't too hard to bite. Freezing works too, just wrap each bar individually in wax paper and stack them in a freezer bag for up to a month.
Flavor Variations
The first time I swapped in white chocolate and pastel sprinkles, my friend thought I'd ordered them from a bakery. You can also stir a half teaspoon of vanilla or almond extract into the melted marshmallow for extra depth. Dark chocolate lovers should use 70 percent cacao chips and a sprinkle of flaky sea salt on top. I've even folded mini chocolate chips or toffee bits into the cereal mixture before pressing it into the pan, and the result was pure magic.
Troubleshooting Common Issues
If your bars fall apart when you slice them, chances are you didn't press the mixture firmly enough or the marshmallow didn't fully melt. Chocolate that won't spread smoothly usually means it cooled too much, just pop it back in the microwave for ten seconds and stir. When the chocolate cracks after setting, it often means the base was still too warm when you poured it on, so give that cereal layer a full ten-minute rest next time.
- Use fresh marshmallows, stale ones don't melt as smoothly and can leave lumps.
- Wipe your knife with a damp towel between cuts for those clean, professional-looking edges.
- If you're in a humid climate, refrigerate the finished bars to keep the chocolate from sweating.
 Pin it
 These bars have become my go-to whenever I need something that feels special without the stress. Whether you're packing lunchboxes, filling a dessert table, or just treating yourself on a quiet evening, they deliver every single time.
Frequently Asked Questions
- → Can I use regular marshmallows instead of mini marshmallows?
Yes, you can substitute with about 4 cups of regular marshmallows. They may take slightly longer to melt, but the result will be the same once fully incorporated.
- → What type of chocolate works best for the topping?
Semisweet or dark chocolate chips provide the best balance of sweetness and richness. You can also use milk chocolate for a sweeter coating or white chocolate for a festive variation.
- → How do I prevent the treats from sticking to the pan?
Grease the pan thoroughly with butter before adding the mixture. You can also line it with parchment paper, leaving overhang on the sides for easy lifting once set.
- → Why add oil to the melted chocolate?
The vegetable or coconut oil helps thin the chocolate slightly, making it easier to spread smoothly and giving it a glossier finish when set.
- → Can I make these ahead of time?
Absolutely. Store them in an airtight container at room temperature for up to 3 days or refrigerate for up to a week. They're perfect for preparing before parties or gatherings.
- → How can I cut clean bars without cracking the chocolate?
Use a sharp knife and wipe it clean between cuts. For even cleaner edges, warm the knife briefly under hot water, dry it, then cut. This helps slice through the chocolate smoothly.