 Save
Save I'll never forget the Halloween party three years ago when my nephew's eyes lit up at the sight of a creamy skull spread surrounded by colorful veggie bones. It wasn't just the spooky presentation that won him over—it was that moment when food became pure imagination, when a platter of cream cheese and vegetables transformed into something that made everyone at the table laugh and reach for more. That's when I realized this wasn't just an appetizer; it was edible fun that brought people together.
I remember my daughter asking if she could help make it the morning of her school Halloween party. We spent an hour arranging vegetables like we were creating edible art, and when we arrived, every other parent wanted the recipe. That's when I knew this spread had passed the ultimate test: it made someone else want to recreate it.
Ingredients
- Cream cheese, softened: This is your canvas—make sure it's truly soft so it spreads smoothly without tearing. Cold cream cheese will frustrate you, so take it out 30 minutes before starting
- Sour cream: The secret ingredient that keeps the spread creamy and prevents it from being too dense, while adding a gentle tang that makes people ask what's in it
- Garlic powder: Just enough to make people wonder if you added fresh garlic—it's sophisticated without being overpowering
- Lemon juice: A squeeze of brightness that prevents the spread from tasting flat and adds a whisper of freshness
- Salt and pepper: The foundation that brings everything into focus and makes the garlic sing
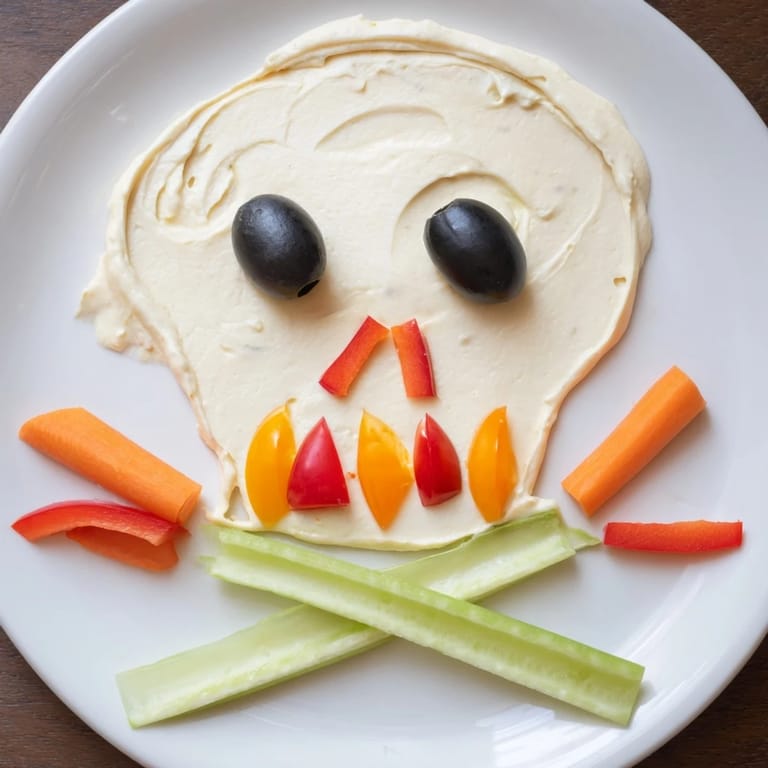
- Black olives: These become haunting eyes that stare back at you, and their briny flavor cuts through the richness beautifully
- Red bell pepper strips: They form the mouth and add pops of color that make the skull feel alive and cheerful rather than morbid
- Carrot rounds and slices: They serve as teeth, the nose, and structural pieces that define the skull's character
- Cucumber slices: Fresh and light, they fill in the cheeks and jawline, adding moisture and texture variety
- Celery sticks or breadsticks: The bones beneath the skull that complete the theme and provide satisfying crunch when eaten
Tired of Takeout? 🥡
Get 10 meals you can make faster than delivery arrives. Seriously.
One email. No spam. Unsubscribe anytime.
Instructions
- Blend the soul of the spread:
- In a medium bowl, combine the softened cream cheese with sour cream, garlic powder, lemon juice, salt, and pepper. Mix slowly and deliberately until smooth and creamy—think of it like sculpting clay before shaping. You want zero lumps, so take your time here. Taste it and adjust seasoning; this is your moment to make it yours.
- Sculpt the skull shape:
- On your largest serving platter, use a spatula to shape the spread into an oval skull form. Don't worry about perfection—rough edges add character. Smooth the surface with gentle pressure, creating a canvas for your vegetable features. Step back and look; this is your masterpiece beginning to emerge.
- Position the crossbones:
- Slide the celery sticks or breadsticks underneath and crossing behind the skull's bottom jaw, creating an X shape that's recognizably skeletal. This frames everything and signals to guests that fun is about to happen.
- Place the haunting eyes:
- Position the black olive halves where eyes should be, pressing them gently into the cream cheese. They should stare slightly forward, giving your skull personality and presence.
- Add facial features:
- Arrange carrot pieces for the nose in the center, then use red pepper strips to form a mouth—curved up for a grin or straight for a more serious expression, depending on your mood. Carrot rounds become teeth along the mouth's edge, creating definition and dimension.
- Fill in the details:
- Use cucumber slices to fill the cheeks and jawline, creating a fuller face. Add any remaining vegetables to enhance color and texture, filling gaps until you've created a cohesive character that feels complete.
- Add the final flourish:
- Sprinkle fresh parsley or chives across the top for a haunting green tint that catches light and adds genuine freshness. Arrange crackers or vegetable dippers around the platter, inviting people to dig in and discover the delicious spread beneath the spooky exterior.
 Pin it
 What moved me most was watching a shy kid who usually sits quietly suddenly become animated describing the "skull spread" to his parents. He felt like he'd discovered something special, something slightly dangerous and thrilling. That's when I understood that presentation matters—not for vanity, but because it opens doors to joy and connection.
Customizing Your Skull
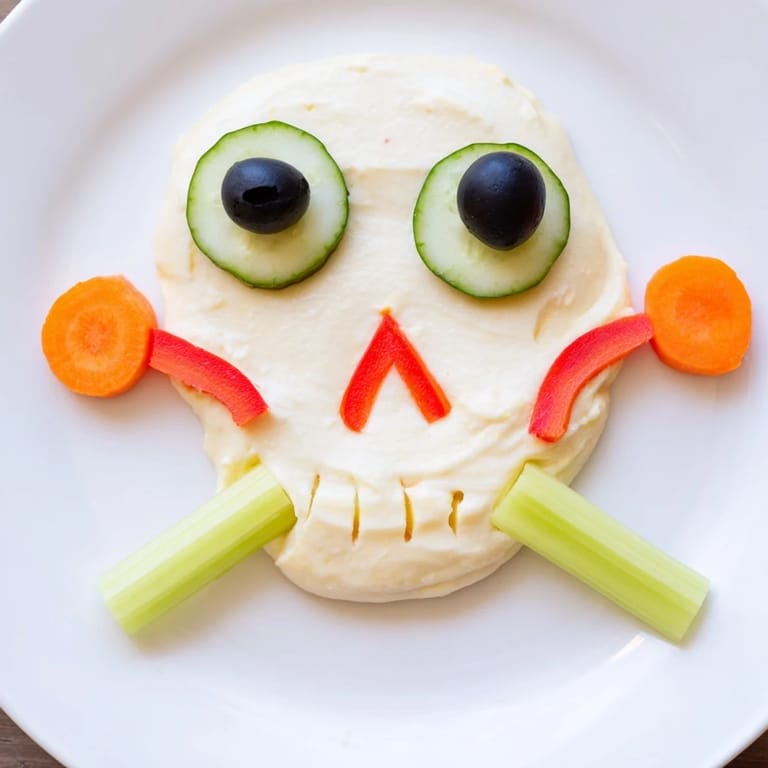
The beauty of this appetizer is that it bends to your creativity. Want a spookier vibe? Use all black olives for both eyes and nose, and arrange red peppers to look like a sinister grimace. Prefer friendly? Add a carrot nose and red pepper smile that make it look almost cheerful. I've added roasted red peppers for deeper color, swapped vegetables for what's in season, and even tried herbed cream cheese when I had fresh basil. The skull is your template; the vegetables are your vocabulary for expression.
The Secret to Keeping It Fresh
The spread stays best when assembled no more than 2 hours before serving. If you're worried about timing, prepare the spread and vegetables separately, then assemble just before guests arrive. The cream cheese won't dry out, and the vegetables will stay crisp and firm. I've learned that this last-minute assembly actually makes the process fun—you're composing art right before the show starts, and that energy carries through to your guests.
Serving & Storage Wisdom
Serve this chilled or at cool room temperature—the spread is silky and perfect when it's not warm. Arrange your crackers, pita chips, or fresh vegetable dippers in clusters around the platter so guests feel welcomed to start eating immediately. This spread brings out the best in almost any accompaniment, whether you're offering crispy crackers, hearty breads, or refreshing raw veggies.
- Keep the finished platter in the refrigerator until guests arrive, and return it after 30 minutes of sitting out at room temperature
- Any leftover spread (if the vegetables don't all get eaten) keeps for 3 days in an airtight container and makes an excellent dip for lunch
- For a gluten-free celebration, double-check your breadsticks or stick with celery, and choose gluten-free crackers for dipping
 Pin it
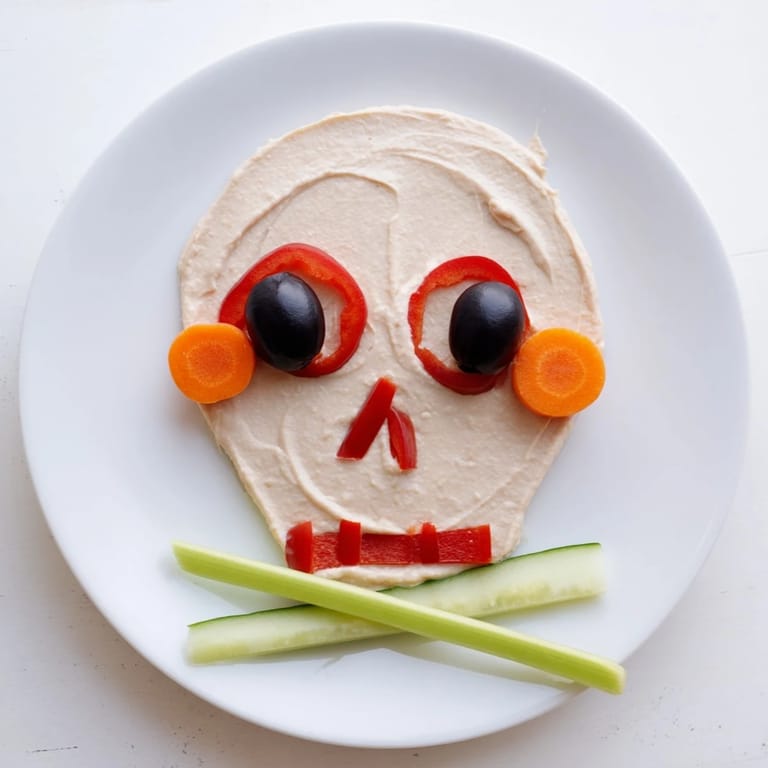
 This recipe taught me that the most memorable food isn't always complicated—it's the dishes that make people smile and feel like you put thought into entertaining them. The Skull and Bones spread does exactly that, turning a simple appetizer into an experience.
Frequently Asked Questions
- → What ingredients create the creamy base?
The creamy base is made from softened cream cheese blended with sour cream, garlic powder, lemon juice, salt, and pepper for a smooth, tangy flavor.
- → How is the skull shape formed?
The spread is shaped into an oval skull using a spatula, providing a smooth surface for arranging the vegetable decorations.
- → Which vegetables are used for decoration?
Cucumber slices, black olive halves, red bell pepper strips, carrot rounds, and celery sticks or breadsticks are arranged to mimic the skull’s features and crossbones.
- → Can this be adapted for gluten-free diets?
Yes, use only celery sticks instead of breadsticks to keep the dish gluten-free.
- → How long does preparation take?
The entire preparation is quick, taking about 20 minutes with no cooking time.
- → What are some serving suggestions?
Serve chilled alongside crackers, pita chips, or fresh vegetable dippers for added texture and flavor.