 Save
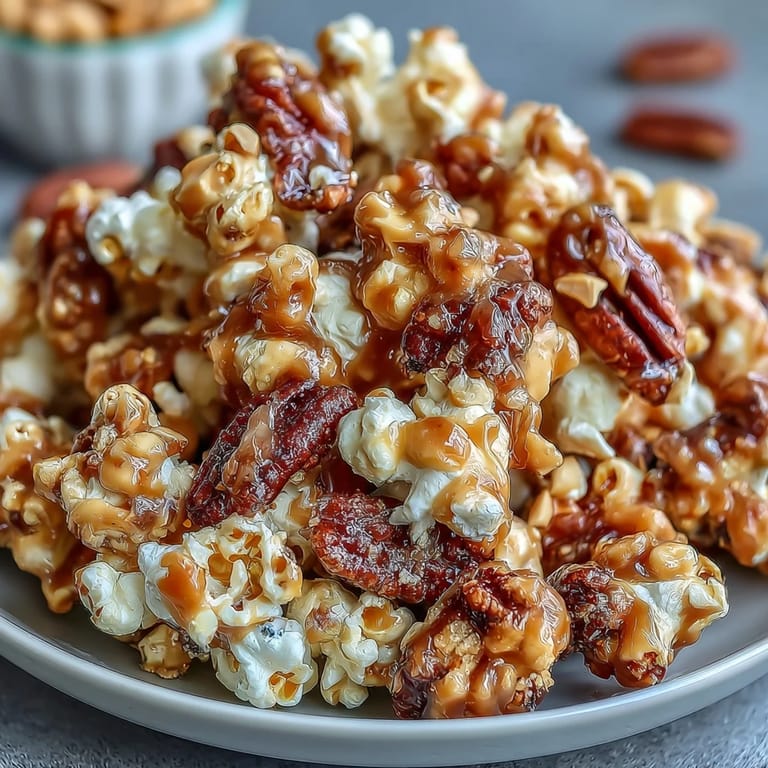
Save There's something about the smell of caramel bubbling on the stove that instantly takes me back to bleachers and summer nights. My neighbor brought this popcorn mix to a block party years ago, and I watched people gravitate toward her cooler like moths to a flame, completely abandoning their other snacks. When she finally shared the recipe, I realized the magic wasn't just in the ingredients—it was in that moment when the baking soda hits the hot caramel and everything froths up like edible gold. Now I make it whenever friends gather, whether it's opening day or just a random Tuesday that needs celebrating.
I'll never forget the chaos of my first attempt at this mix—I got distracted by my daughter asking about her soccer schedule and completely forgot to stir every 15 minutes. The bottom turned dark while the top stayed pale, creating this weird two-tone disaster. But you know what? It still tasted incredible, just with some pieces more caramelized than others. Now that accidentally-uneven batch is actually my favorite version, and I sometimes intentionally vary my stirring just to recreate that happy accident.
Ingredients
- Freshly popped popcorn (10 cups): Use plain, unsalted popcorn so the caramel seasoning shines—air-popped or stovetop popped both work beautifully, and skip the microwave packets which tend to be too buttery.
- Roasted, salted peanuts (1 cup): These provide structure and a salty contrast that makes the caramel feel less heavy, so don't swap them for raw or unsalted versions.
- Light brown sugar, packed (1 cup): The molasses in brown sugar creates that deep, complex caramel flavor that white sugar simply can't match.
- Unsalted butter (1/4 cup): The butter carries the flavor, so use real butter and resist the urge to melt it first—the cooking process does that for you.
- Light corn syrup (1/4 cup): This prevents crystallization and keeps your caramel smooth and glossy instead of grainy.
- Kosher salt (1/2 teaspoon): Don't skip this or reduce it; it's the secret player that balances sweetness and makes people ask what you did differently.
- Baking soda (1/4 teaspoon): The moment of truth—this is what creates that gorgeous foam and makes the caramel airy instead of dense.
- Pure vanilla extract (1/2 teaspoon): A small amount that rounds out the flavor and adds a warmth people can't quite put their finger on.
Tired of Takeout? 🥡
Get 10 meals you can make faster than delivery arrives. Seriously.
One email. No spam. Unsubscribe anytime.
Instructions
- Set yourself up for success:
- Preheat your oven to 250°F and line a large baking sheet with parchment paper—you want everything ready because the next steps move fast. Pour your popped popcorn and peanuts into a big bowl and give them a toss so they're evenly mixed.
- Build the caramel base:
- Combine brown sugar, butter, corn syrup, and salt in a medium saucepan over medium heat, stirring often until it bubbles gently. You'll know it's ready when it looks cohesive and smells absolutely irresistible.
- Let it boil undisturbed:
- Once it reaches a gentle boil, set a timer for 4 to 5 minutes and resist the urge to stir—this time lets the mixture concentrate and develop that rich caramel color. Your patience here pays off in deeper flavor.
- The magic happens now:
- Pull the pan from heat and immediately stir in baking soda and vanilla—the mixture will foam and expand like it's alive, which is exactly what you want. This is the moment where everything transforms.
- Coat everything quickly:
- Pour the hot caramel over your popcorn and peanuts while it's still warm, then use two wooden spoons or spatulas to toss constantly until every piece is coated. Work efficiently because the caramel sets as it cools.
- Spread and bake evenly:
- Transfer the coated mixture onto your prepared baking sheet, spreading it in a single layer as best you can. Bake for 45 minutes, stirring every 15 minutes—this is the secret to even, crispy coating rather than burnt edges and pale centers.
- Cool with patience:
- Let everything cool completely on the baking sheet—don't rush this or you'll end up with stuck-together clumps instead of individual crispy pieces. Once fully cooled, break it into clusters with your hands and enjoy.
 Pin it
 My son brought a baggie of this to his Little League tournament last summer, and I watched the other parents literally fight over the last handful like it was the most valuable thing in the snack cooler. That moment—seeing something I made with my own two hands become the thing everyone wanted—reminded me that feeding people well is one of the simplest joys available.
The Art of the Perfect Caramel Coating
Getting the caramel to stick evenly is honestly where most people struggle, and it took me several batches to figure out the rhythm. The key is that your caramel needs to be hot enough to coat everything but cool enough that you can actually handle it without burning yourself. If you pour it on too-cool popcorn, it hardens before distributing properly and you end up with some pieces bare while others are thick with caramel. Temperature awareness—both of the caramel and your popcorn—makes the difference between a mediocre batch and something genuinely special.
Customization Without Losing the Magic
Once you've made this basic version a few times, you'll understand the proportions well enough to play around confidently. I've added everything from mini pretzels for extra crunch to a handful of chocolate chips stirred in after cooling, even a pinch of cinnamon mixed into the caramel itself. The beauty of this recipe is that it has enough structure to handle additions without falling apart, but also enough personality that you should never feel locked into the original.
Storage and Keeping It Fresh
The moment your popcorn mix reaches room temperature, transfer it to an airtight container—humidity is the enemy of crispness, and even a few hours of exposure to air will soften it noticeably. I use glass jars with snap lids because you can actually see when it's time to eat more, plus they stack neatly in the pantry and make everything look intentional rather than haphazard. This keeps beautifully for a full week, though honestly it rarely lasts that long in any house I know.
- Check the seal on your container before storing—a loose lid means stale popcorn by day three.
- Keep it away from direct sunlight and don't store near the stove where heat and humidity congregate.
- If it does get a little soft, you can refresh it by spreading it on a baking sheet and warming gently at 250°F for about 5 minutes.
 Pin it
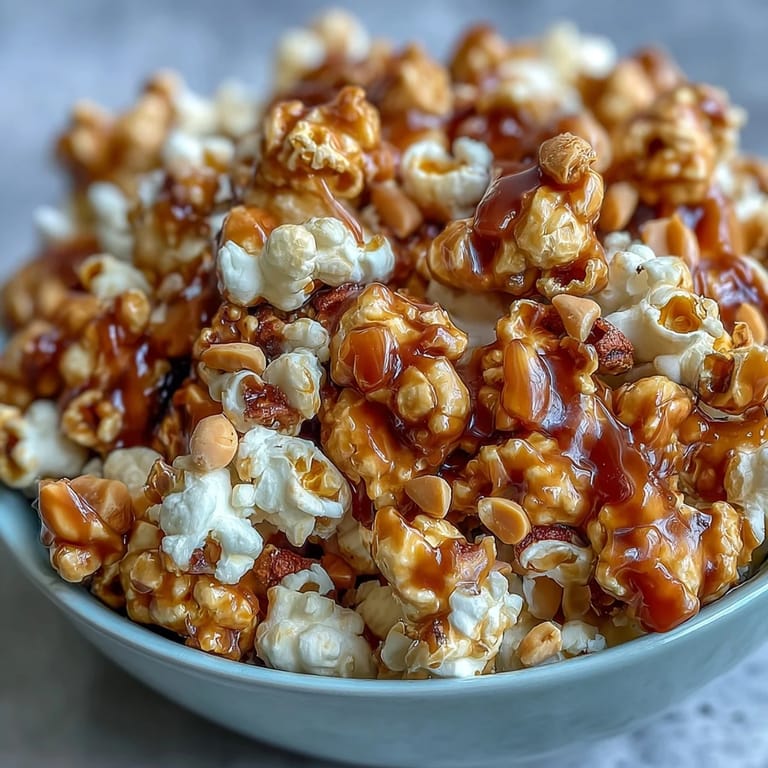
 This recipe has become my go-to snack for every gathering, and the payoff is always worth those 45 minutes of intermittent stirring. There's something deeply satisfying about knowing you made something crunchy and delicious from scratch.
Frequently Asked Questions
- → What type of peanuts work best in this mix?
Roasted and salted peanuts provide a perfect balance of flavor and crunch to complement the sweet caramel coating.
- → Can I substitute the butter for a dairy-free option?
Yes, plant-based butter or margarine works well to keep the caramel coating dairy-free without sacrificing taste.
- → How do I ensure the caramel evenly coats the popcorn and peanuts?
Pour the hot caramel over the popcorn and peanuts immediately after cooking, then quickly toss with spatulas to ensure thorough coverage.
- → What is the purpose of baking the coated mix after tossing?
Baking helps set the caramel coating, creating a crispy texture and preventing clumping in the final snack.
- → How should this snack be stored for freshness?
Store in an airtight container at room temperature to keep the mix crunchy for up to one week.
- → Can additional ingredients be added to this mix?
Yes, mini pretzels or chocolate candies can be added after cooling to introduce extra texture and flavor variety.